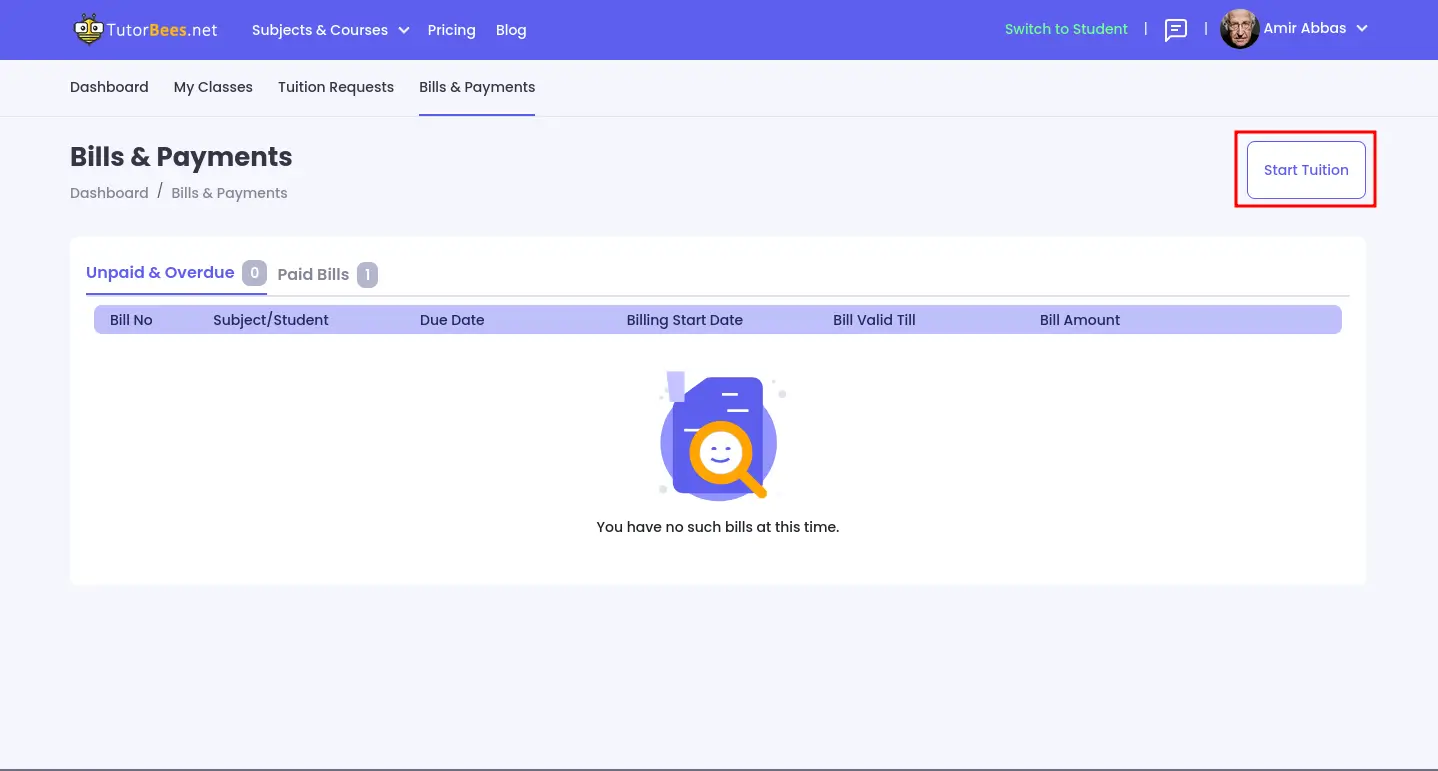
About student bills and your payments
Please note that TutorBees deducts 20% of all student payments as the platform fee.
When can you start paid tuition
You can start a paid tuition only after your student has paid his/her fee bill. You will receive an email confirmation when the bill is paid, and you will be able to create paid classes.
Once the student has confirmed the tuition details and asked you to create the bill, you should do so immediately and let the student know that they should make the payment.
Creating first bill
Your first bill for a student is different from the bills that you create for continuing students because TutorBees team verifies from the student and after that, grants you the access to create paid classes with that student.
Check the step-to-step process for this.
Step 1 - Agreement
At the end of the demo class, student tells you that they want to start paid classes. Both of you agree on:
- Number of hours
- Rate per hour
Step 2 - Start Tuition
Click on Start Tuition button
You need to specify the following details:
- Tuition Name (Name of the Tuition).
- Student (Select the student from the drop-down for which the tuition has to start).
- Hourly Rate (Hourly Rate that you have finalized with your student).
- Number of Hours that are going to be taught.
- Bill Start Date. (Start date for validity of these hours).
- Bill Valid Till. (End date for validity of these hours).
- Subjects (The subjects that are going to be covered in the tuition).
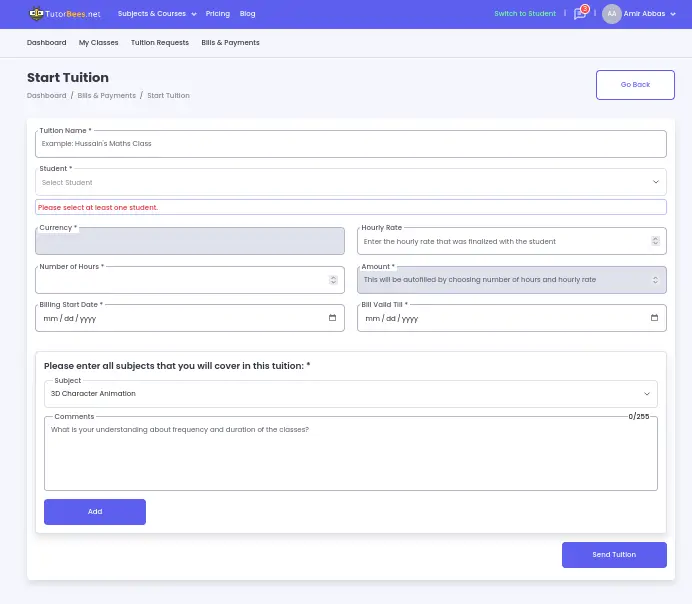
After you have entered the details the bill will be available to the student to pay. In some special cases, the bill is sent to the TutorBees Team for review first, they typically complete the review and issue the bill to the student(s) in 1 business day.
Step 3 - Bill Review
Mostly, the bill is automatically approved. In some special cases, your bill can be sent for review to the TutorBees team. The review process can take up to 1 business day, so keep that in mind when you tell the student(s) about the start date.
If your bill is approved, you will receive an email that your bill is approved.
If your bill is not approved, you will still receive an email along with the reason for its rejection. Most probably, it is because you entered some incorrect detail or the student(s) does not want to proceed with you.
Moreover, the students can also take up to a day or two to pay, so you should start your paid classes after the payment.
Step 4 - Followup
If the student hasn't paid the bill within 1 or 2 days, then you can send a few follow-up messages to the student as a reminder for the unpaid bill.
Step 5 - Starting Classes
When the payment has been made by the student, you will receive an email. At that time, you can start your classes with the student as per your finalized schedule.
You can create a New Tuition for multiple students with the same hourly rate.
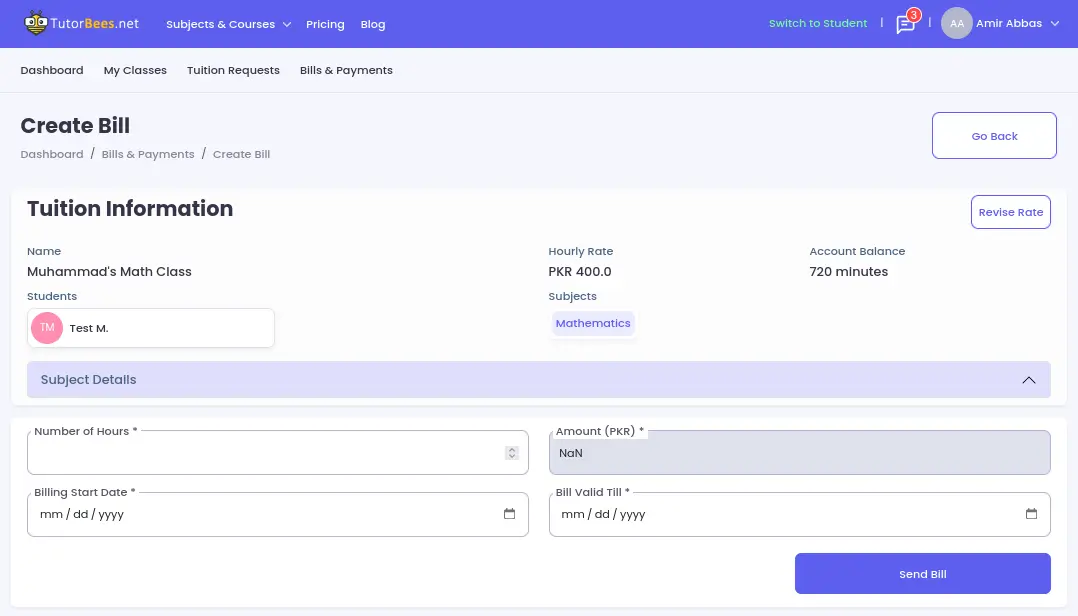
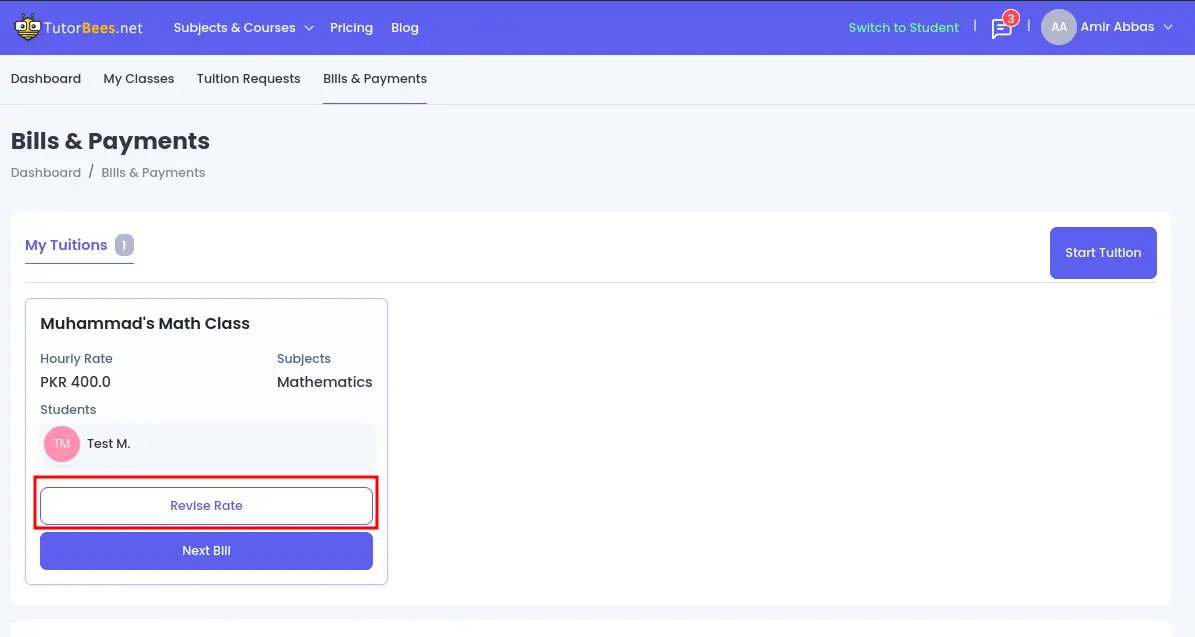
Creating New Bill
When you have completed all hours committed in your last bill, then you need to create a new bill to continue teaching the student.
You can do this by following steps:
- Go to the Bills & Payments Section.
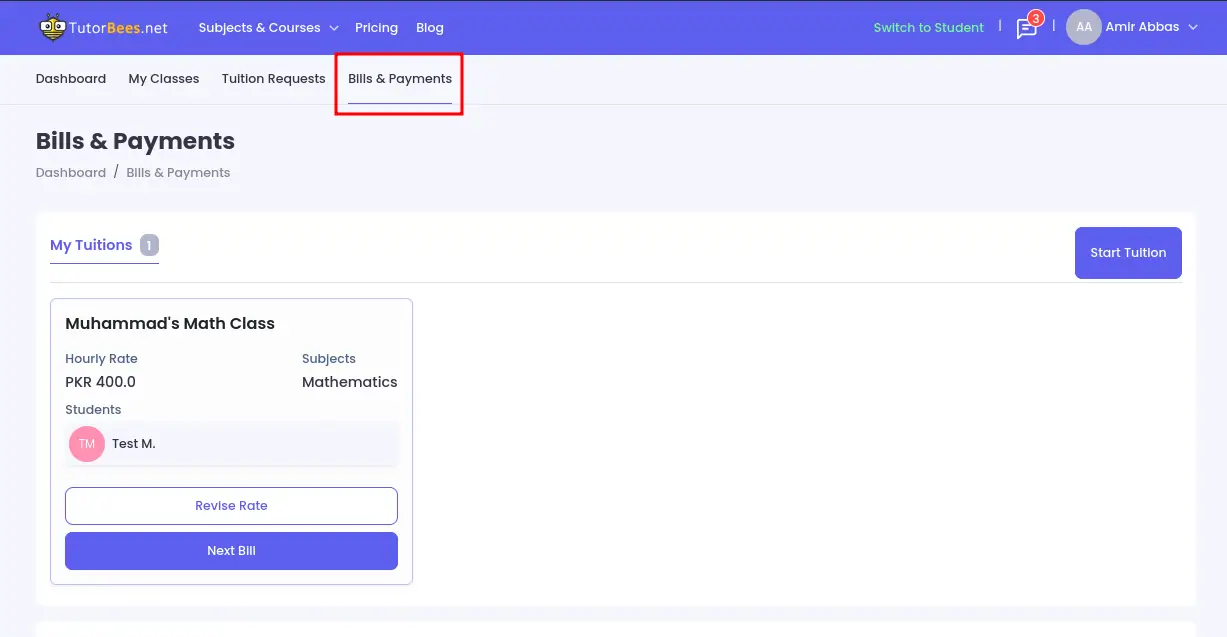
- In the My Tuitions tab, click on the Next Bill to create the next bill for the existing tuition.
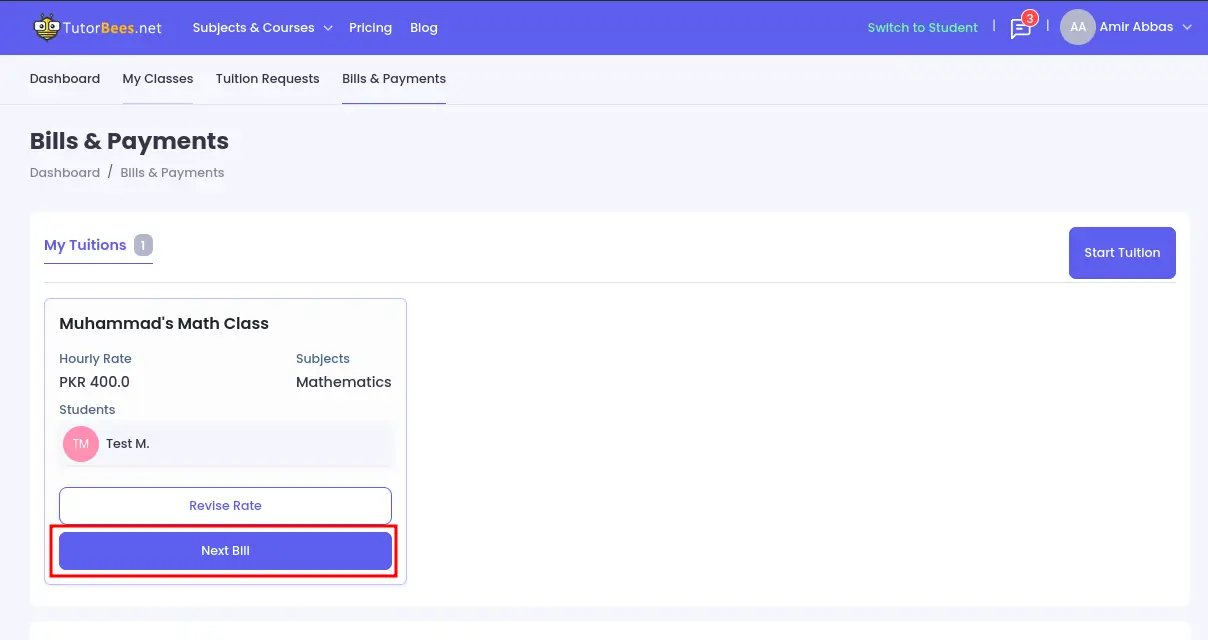
The screen will already be populated with all the details of that student.
You just need to specify the following details and click on Send Bill:
- Number of Hours that are going to be taught.
- Bill Start Date. (Start date for validity of these hours)
- Bill Valid Till. (End date for validity of these hours)
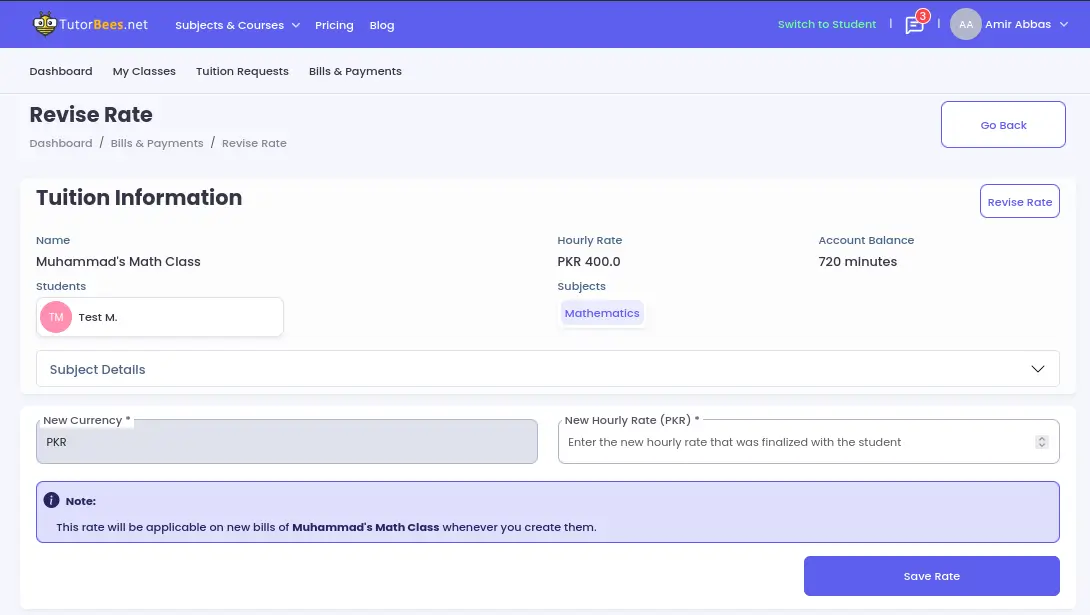
Revise Rate
If you want to revise the rate of an existing tuition, you need to discuss it with the student first. After reaching an agreement, click on the Revise Rate button.
You need to specify the following details and click "Save Rate".
- New hourly rate.
Billing Mode at TutorBees.net
TutorBees.net works on Hourly billing cycle, which involves charging students based on the actual time spent in each lesson. TutorBees.net tracks the duration of each session and the student is charged for the minutes. Here are some key points to consider about hourly billing:
- Flexibility: Lessons scheduled as needed.
- Pay-as-You-Go: Students pay for actual lesson time.
- No Upfront Commitment: Students avoid fixed commitments.
- Validity: The no. of hours mentioned in the bill are only valid till the date specified in the "Bill Valid Till" field specified on the bill. Please encourage your student to utilize all hours within the specified time duration.
Please note that Late/No Show Policy is applicable for all classes.